Saturday, September 1, 2012

Dresses I Must Make

Waiting rooms are not conducive to witty blog posts, as they usually involve one's nerves being on edge. So here are some fabulous frocks that are on my fantasy to do list...
ZOMG! Zone front!
I like the zone front on this and the fabric colors. I wish I could find more pictures of this gown from different angles.
This one because it's butter yellow and lavender...one of my favorite color combinations.


I like the belt and the stripes. It kind of resembles this gown from "The Duchess", except that this one is a zone front.


I like the pink and the flowers on this one.
I'm not sure why I like this one...something about the subtle color combination and the trim, although not particularly crazy about the straight across bottom on the stomacher - I think I would bring it to a point...


I like everything about this dress...the trim, the color combination, the style...


This dress mostly because it is my two favorite colors of blue and purple, but it has some interesting trim and texture as well...


I'm not generally interested in the Baroque period, but having watched a couple of movies set in the time of Charles II, and read about another seamstresses adventure in making a dress from this period, I can say I was a bit intrigued...If I was ever to make a dress from this era, I like the one in this painting of Catherine of Braganza, wife of Charles II, mostly I think because it's pink...


- Posted using BlogPress from my iPhone

Wednesday, August 29, 2012

Regency is not a New York State educational test

Yeah, okay, so the title of this post is lame, and you won't get it if you didn't go to school in New York State...so sue me...;-p

I've been suddenly struck by a mad frenzy of creativity after a long bout of malaise in matters concerning needle and thread. How can you blame me when I have had to endure not one, but TWO college level Algebra classes and you KNOW how I hate Algebra! (Well, maybe you didn't know...but you do now!) It's enough to drain out anything in the left brain...or what's left of my brain...

Quite some time ago I had made a really fabulous Regency stovepipe bonnet of an olive green silk with pink accents;


Of course, one needs a dress to go with it...There are several Regency era costume patterns out on the market, and since my draping skills are non-existant (one of these days I will remedy that), and I wanted something fairly accurate, I decided to go with the pattern from Sense and Sensibility. This pattern has had very good reviews and looks fairly easy to work with and alter.

RGP Cover

I bought the pattern a while ago, but then put it on the back burner. I decided to get it out again and finally make a gown to go with the bonnet. I had a vague idea of what I wanted to make, but did I want long sleeves, short sleeves, removeable sleeves so I could have both?...I scoured the Internet for examples of extant Regency gowns for inspiration but couldn't quite find what I wanted. I had this fabric that I wanted to use, because it went nicely with the colors in my bonnet.


In the meantime, I decided I had better start somewhere, and what better place to start than with underpinnings, because, afterall, you need the foundation before you can build the building. I also purchased the short stays and shift pattern from Sense and Sensibility. I made them entirely by handsewing, no machine at all! It's the first thing I have actually made to wear that I made completely by hand. It was actually a quite relaxing endeavor and gave me something to do whilst watching movies.


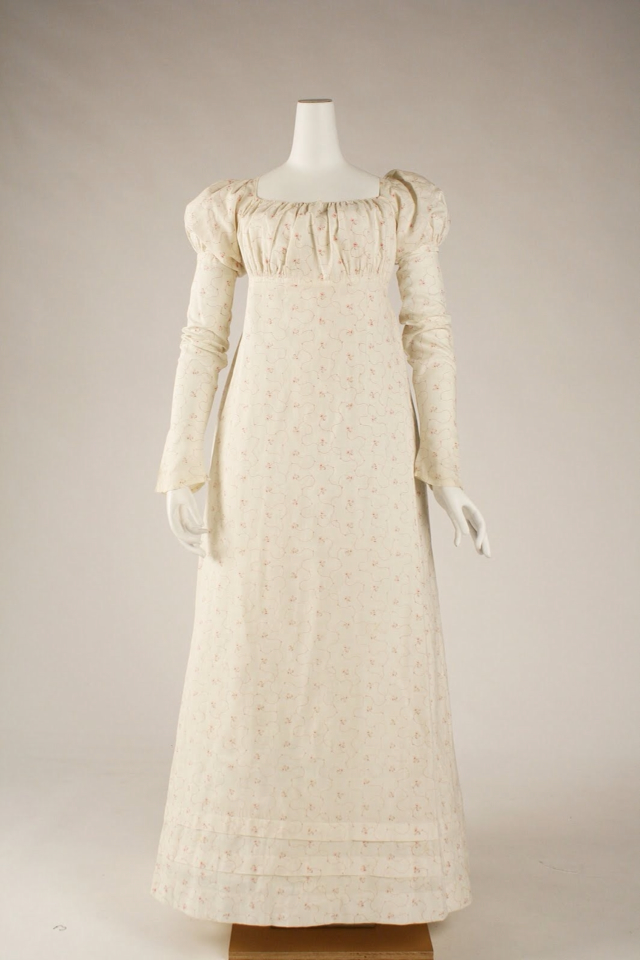
I still had no idea exactly what I wanted to do with the gown, until a few days ago while perusing Tumblr when I stumbled upon the perfect dress, which is on display at the Metropolitan Museum of Art in NYC! My fabric will work nicely with it and I like the simple, yet sweet look of it...


Sunday, June 17, 2012

Regency Shoes

I've been bad about keeping up with this blog, but I haven't really made anything worthy of posting. I've been collecting a series of historical reproduction shoes from American Duchess, and the fun part is you can embellish them yourself. I decided to decorate my Pemberlies, but first I wanted to practice. I had a pair of cheap white ballet flats from Walmart that I thought I would paint.


I got some acrylic leather paint from Tandy and mixed together white and yellow to make a pale yellow. I took the liberty of using the same yellow/blue combination that Lauren from American Duchess used on her Pemberlies as my practice colors. There was already a grosgrain ribbon border on the shoes which I colored blue with a marker.


I then pleated some grosgrain ribbon and hot glued it to the top of the shoes.


Then I made a couple of different embellishments from ribbon and sewed shoe clips on them.


- Posted using BlogPress from my iPhone

Saturday, August 13, 2011

Tails o' the Sea

Oh boy! What have I gotten myself into this time...This is proving to be messier and more difficult than I thought, but I'm already committed...(or is that I should BE committed!) I slathered on a thicker layer of Alex caulking, let it get gummy and then laid down fish net. I was going to try the metal grate "stamp" thing, but couldn't find a grate with the right pattern locally. So, I know I had seen someone using fish net to make the scales; however, what I didn't realize is that the net doesn't come off of the caulk as easily as I thought it might. Either that, or I have to let it get even more "cured" before I try pulling it off.
Since the caulk is still "moldable", I experimented with sculpting the scales where the tail goes into the fluke - using an ordinary spoon...It seemed to work out pretty good. I may have to add more caulk as I go along to fill in holes and spots, but I think that may work out pretty good. For the fluke, I used a combination of a chopstick and a sponge paint brush that I had cut so that I could give the fluke some texture.
It doesn't look too bad so far for my first attempt at this, but I'll need to work at it some more to "clean it up"  before I consider it ready to paint. Now to find an affordable air brushing kit and generator...

Well, that was a bad idea - soon after I went to check if I should pull the netting out, I realized that I had let it dry *too* long and that I couldn't get the net out without tearing up my fabulous caulking job. So, in a panic, I posted to the MerNetwork forums and asked for some advice. Merbel, who wrote the tutorial I am using, answered me and said to remove the net "immediately!", that it was better to waste the caulk than to ruin the neoprene and that I had indeed left the netting in the caulk for too long. She said I could always go back over it with more caulk to "fix" it. So, I carefully tore the netting away (it was a real bi*ch, I tell you!) and was left with quite a mess...it totally tweaked most of the tail and took away a good deal of caulk with it.
Interesting effect!
It did leave some kind of cool looking intermittent scales though...So, back to the drawing board. I tried to fill in some of the empty spots - I may just kind of leave it with the intermittent scales...gives it a kind of punk, tattered fish effect, maybe more realistic and not so perfect. I'm still working on it and trying to figure out different ways to "sculpt" the scales. The edge of a teaspoon works pretty good if you press it upside down into the caulk while it's still kind of gummy and sticky.
I really wish the metal grating had worked out. I ended up finding some at Lowe's, but I felt that the shapes were too small for the size of the tail. I thought about finding one of those copper cake/jello molds that look like a fish and using the scales on that as a stamp. I still may try that if I can find one....there's got to be a better way!

Monday, August 8, 2011

Tails o' the Sea

After having been side tracked for most of the summer with other things (mainly a grueling schedule at work, and my 30th class reunion), I am back on track with the mermaid tail. In my first post I mentioned that I hadn't taken into account how long my tail would actually have to be with the fluke included, and therefore hadn't bought enough neoprene - but wait! I had a brainstorm and solved my problem, thereby saving myself a trip and some cash. I just used a little thing called - flat-locking. It's a way to join two pieces of fabric (or in this case neoprene) together, and since it was going to be covered with latex caulking anyway, it would never be seen.
I made the join in the fluke, because it would be less noticeable and it wouldn't matter if it was watertight, as you don't want your fluke filling up with water anyway. It worked like a charm! My fabulous Husqvarna Viking Sapphire 835 sewing machine handled the neoprene with ease!
Now for the latex part - I bought a buttload (yes, that is a technical term) of Alex silicone latex caulking at Walmart (Caulking -it's not just for bathrooms anymore!), the kind that dries clear and some cheap sponge paint brushes, as I'm sure I'll go through quite a few of those...
I laid out one side of the tail on my work table and squeezed the caulk onto it, using the sponge paint brush to smooth it out and "paint" the caulking over the tail. I left the very edges as bare as possible so the two sides can be sewn together later. The first layer doesn't need to be very thick, so I spread it out as thin as possible but still making sure I had coverage.
LOL! Note the "Pirates of the Caribbean - White Cap Bay" Lego box
It was a bit hard to spread thinly, but I think I managed to do it correctly (how would I know, I've never done it before!) So, now to let it dry. I'm not sure how long it is supposed to take, but I would imagine at least a couple of hours. I'll do the other side tomorrow after this dries, as my work table wasn't big enough to do both sides at the same time (I had to duct tape that Lego box to the end of the table to make it just long enough to lay the tail out without any hanging over the edge)

Friday, July 15, 2011

Georgie Girl

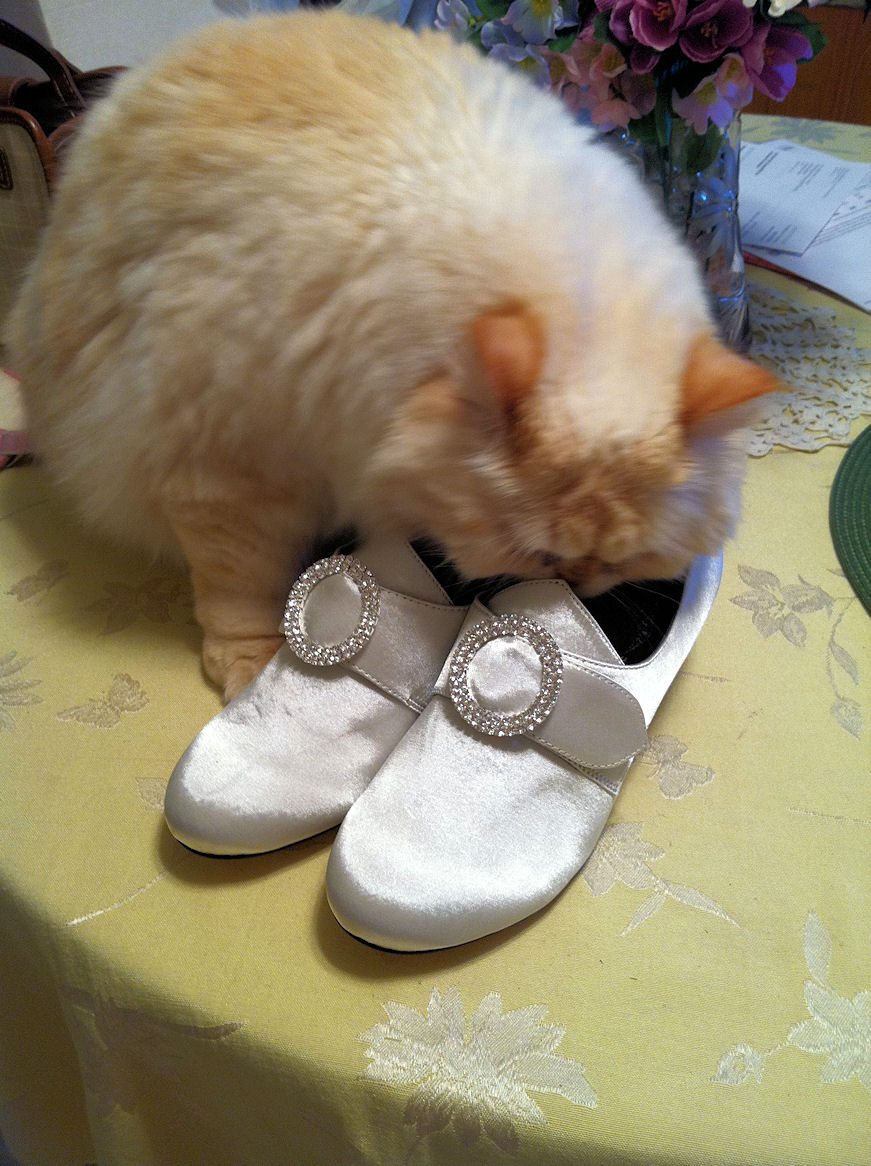
I finally received my "Georgiana" 18th century shoes from American Duchess the other day in the mail! Yay! They will join such illustrious historical shoes in my closet as my red "Titanic" boots, my mid-19th century side-scallop boots and my hand-made leather ghillies! Mr. T thoroughly approved of them!
I got the round buckles, but I think I may get some square ones too, just for a different look...Or I'll try the "ribbon lappet" thing.
I had a hard time deciding what color to dye them! Pink? Blue? Green? I decided on blue, with green grosgrain trim around them, so I fearlessly jumped into the whole dyeing thing with reckless abandon! Was I afraid of ruining them? You bet! But I figured the worst I would have to do is make them some sort of darker color or maybe try dye remover. At any rate, I decided to try the tutorial on dyeing shoes by The Dreamstress I picked up some royal blue dye at Walmart - it was Tulip brand - less than a buck - and I wasn't sure how well it would work, but it was either that or Rit and I wasn't really sure there was that much of a difference except price.

I heated up some water on the stove, poured it into my stainless steel sink, added the dye and stirred it up. I then took a paint brush - all I had was a 1" wide paintbrush, not the wide one that is used in the tutorial, and I crossed my fingers that it would work. First, I tried it out on the swatch that was included with the shoes (what a freakin' awesome idea! Thanks, Lauren!), I let it dry and it didn't look half bad, so I dove into the shoes. Here is one shoe after one coat....Not too shabby! I was definitely impressed with both the dye and the ease and results of the technique of "painting" the dye on as opposed to "immersing" something in dye.
The lighting was a little dark in my kitchen, and the shoe was a bit damp, so it looks a little darker in this picture than it actually is after one coat. It looks a little closer to this picture:
I'm really excited about this! I think I'll give it one more coat after it dries good and call it a day! I've never dyed shoes before - I've been in weddings and had the shoes dyed, but this is so easy and SOOO much cheaper, that I would recommend this method to anyone who wants to dye a pair of silk shoes!

Here are a couple more photos of the finished product with different looks to the shoe. After I finished the dyeing process, I hand sewed green grosgrain ribbon around the edges. I also made a green and blue cockade and tried both the round buckles and square buckles.


The lighting was a little different on the last two pictures, so they look lighter blue than they actually are - The color is closer to the blue in the first picture with the round buckles.

Hawaii 5-O

This ended up taking a little longer than usual...After being side tracked with visiting relatives, relative's birthday parties and more visiting relatives, not to mention work has been BRUTAL, I *finally* finished this dress....or so I thought....
You'll have to excuse the really baaad lighting - it was late and I had just wrestled the dress onto my doppelganger, who I found out was quite a bit bigger than I am right now, and I could barely close the zipper. When I actually tried the dress on myself, the top and the waist were too big, so, I will have to take it in - ugh, what a pain in the arse...but I WILL have it finished by next weekend!